Power Racks for Home Gyms
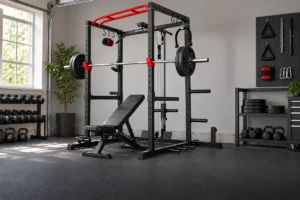
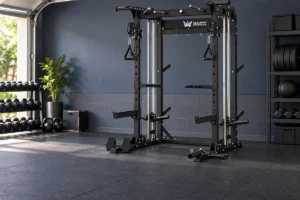
A power rack surrounds the lifting area with four uprights and provides adjustable positions for a barbell and safety system. This design can support squats, presses, pulls, and accessory work when the rack is assembled and used according to the manufacturer’s instructions. The right home gym power rack should fit your room, match your equipment, and provide practical adjustment points for the exercises in your program.
This category brings together power rack buying guides, individual product reviews, and direct comparisons. Use these resources to understand rack sizes, frame layouts, safeties, attachments, and compatibility before choosing a model. Specifications and included components can change, so confirm the exact product listing and current manual before buying or installing equipment.
Measure the Rack and the Training Area
Published power rack dimensions describe the frame, but the usable area is larger. Leave enough room to load plates, move a bench, approach the bar, and perform each lift without contacting walls, doors, lights, or stored equipment. Check ceiling height above the pull-up bar and allow space for your head and hands. Baseboards and sloped garage floors can also affect placement.
Measure the path from the delivery point to the installation area. Long uprights and crossmembers may be difficult to move through stairs, hallways, or narrow doors even when the assembled footprint fits the room. If the rack will share space with a vehicle or other household use, map both the operating footprint and the clearance needed when the rack is idle.
Power Rack Safety Systems and Adjustment
Power racks commonly use pin and pipe safeties, safety straps, or solid safety arms placed between the front and rear uprights. Each system has its own adjustment method and usable range. Check whether the supplied safeties cover your planned bar height and whether optional alternatives are compatible with the exact rack series. Set the safeties for the exercise before loading the bar.
Hole spacing affects how precisely you can position J cups and safeties. Closer spacing can be useful around bench press height, while wider spacing may be sufficient for squats and other lifts. Numbered uprights make repeated setups easier. Review the adjustment hardware, locking method, and manufacturer’s instructions rather than assuming that attachments with similar dimensions are interchangeable.
Frame Size Stability and Installation
Rack height, depth, upright size, and base design all influence how a rack fits and behaves. A deeper rack provides more room inside the frame but requires more floor space. A short rack may fit beneath a low ceiling, yet it can change pull-up clearance and bar placement. Compact power racks deserve the same careful review of usable space, safeties, and attachment positions as full-size models.
Some racks are designed to be anchored, while others use a flat-foot base or storage weight to support their intended setup. Follow the manufacturer’s installation requirements and confirm that the floor and mounting method are suitable. Published capacity figures may apply only under specific conditions, so check the manual for the exact model and avoid treating one number as a complete measure of stability.
Compatibility With Benches Barbells and Plates
A power rack must work with the equipment around it. Check whether your bench can roll or slide into the correct pressing position and whether its feet interfere with the rack base. Confirm that the barbell provides enough shaft space between the sleeves for the chosen uprights and J cups. Plate storage should leave room for the bar path and for loading the bar safely.
If you plan to use resistance bands, cable systems, landmine attachments, or dip handles, identify the required mounting points and working clearance. Attachment compatibility often depends on upright dimensions, hole diameter, hole spacing, and the side of the upright where holes are available. Use the manufacturer’s compatibility list for the rack generation you are considering.
Power Rack Attachments and Future Expansion
Attachments can expand a rack, but they also add cost and occupy space. Start with the bar supports and safety system needed for your core lifts. Then consider a pull-up bar, plate storage, cable attachment, dip station, or landmine only if it fits your program and room. A large attachment catalog has little value when the attachments you need cannot be used comfortably in your layout.
Before buying into an equipment ecosystem, check the price and availability of likely additions. Some components extend beyond the frame or require extra ceiling and side clearance. Include those dimensions in the original room plan so a later upgrade does not block a doorway, storage area, or another exercise station.
How to Choose a Power Rack
Begin with the lifts you expect to perform and the maximum rack height and footprint your room can accept. Decide which safety system and adjustment range you need, then verify compatibility with your barbell, bench, plates, and flooring. Compare the complete cost, including delivery, installation hardware, and essential attachments, rather than comparing frame prices alone.
Use a buying guide to define your requirements, a product review to examine a specific model, and a comparison when two racks appear close. Before ordering, check the current dimensions, included components, assembly instructions, warranty, shipping conditions, and return policy. A suitable power rack should make your planned setups repeatable without creating avoidable conflicts in the room.